To define or change the print styles in Microsoft Outlook, please do as following:
1. Click the File > Print > Print Options in Outlook 2010 and 2013. See screen shot:
Note: If you are using Microsoft Outlook 2007, please click the File > Page Setup > Define Print Styles, and then skip to the Step 3.
2. In the pop-up Print dialog box, click the Define Styles button. 
3. In the define Print Styles dialog box, select a print style and click the Edit button. 
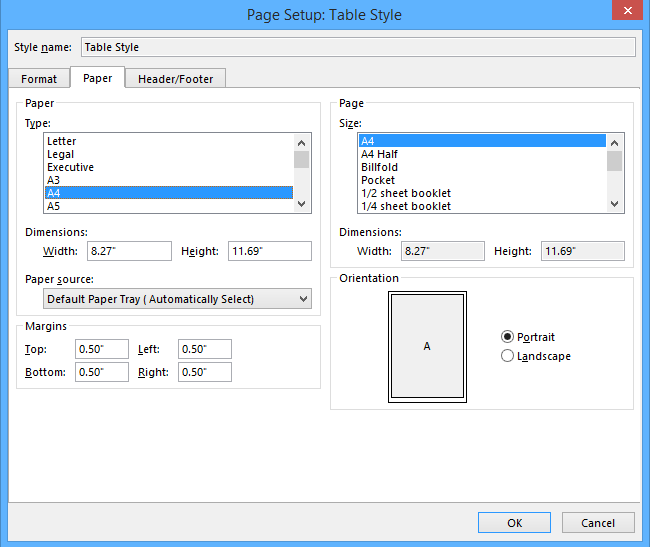
4. In the Page Setup dialog box, you can define your print style. There are three tabs in the Page Setup dialog box, and:
(1) In the Format tab, you can define the font and font size of column headings and rows (or titles), and shadings for your print style.
(2) In the Paper tab, you can define the paper type, paper dimensions, page size, margins, orientations, etc.
(3) In the Header/Footer tab, and you can define the header/footer, and its font/size
5. Exit all dialog boxes by clicking the OK button, your setting should now be saved.